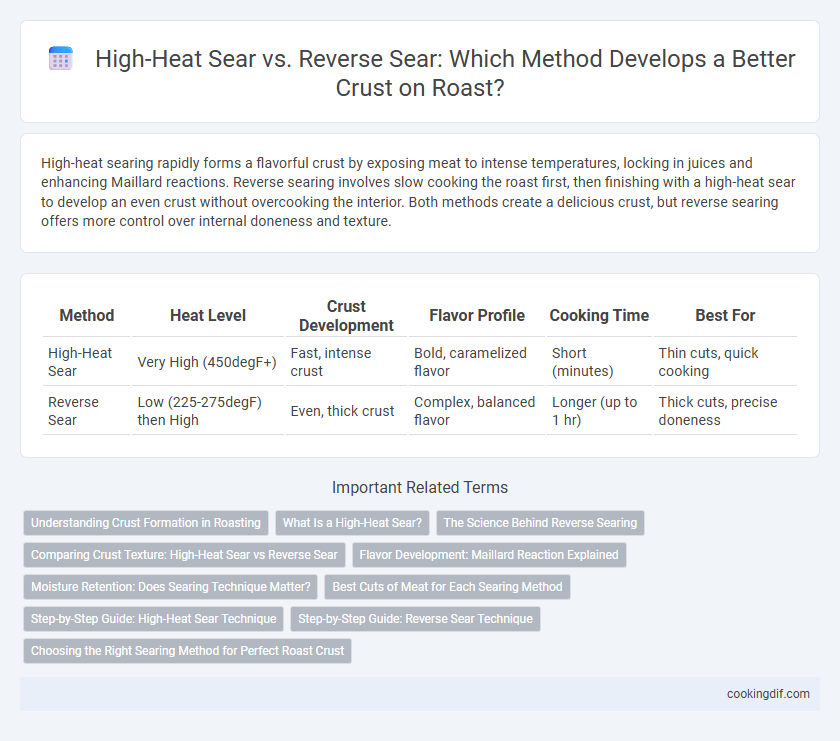
High-heat searing rapidly forms a flavorful crust by exposing meat to intense temperatures, locking in juices and enhancing Maillard reactions. Reverse searing involves slow cooking the roast first, then finishing with a high-heat sear to develop an even crust without overcooking the interior. Both methods create a delicious crust, but reverse searing offers more control over internal doneness and texture.
Table of Comparison
| Method | Heat Level | Crust Development | Flavor Profile | Cooking Time | Best For |
|---|---|---|---|---|---|
| High-Heat Sear | Very High (450degF+) | Fast, intense crust | Bold, caramelized flavor | Short (minutes) | Thin cuts, quick cooking |
| Reverse Sear | Low (225-275degF) then High | Even, thick crust | Complex, balanced flavor | Longer (up to 1 hr) | Thick cuts, precise doneness |
Understanding Crust Formation in Roasting
High-heat sear creates a Maillard reaction on the meat's surface quickly, developing a dark, flavorful crust by rapidly caramelizing proteins and sugars. Reverse sear involves slow roasting at low temperatures to ensure even internal cooking, followed by a final high-heat sear that enhances crust formation without overcooking the interior. Understanding crust formation in roasting highlights how temperature control and timing influence texture, flavor, and moisture retention in the finished product.
What Is a High-Heat Sear?
A high-heat sear involves cooking meat at temperatures typically between 400degF and 500degF to rapidly brown the surface and develop a flavorful crust through the Maillard reaction. This method locks in juices by creating a caramelized exterior, enhancing texture and taste. Chefs often use cast iron skillets or grilling grates for high-heat searing to achieve optimal crust formation quickly.
The Science Behind Reverse Searing
Reverse searing leverages controlled low-temperature cooking followed by a high-heat finish to maximize Maillard reactions, achieving a uniform crust while preserving internal juiciness. This method enhances crust development by allowing proteins to denature gradually, reducing moisture loss and promoting even browning across the surface. Scientific analysis shows that the reverse sear optimizes flavor and texture through precise temperature gradients that traditional high-heat searing often compromises.
Comparing Crust Texture: High-Heat Sear vs Reverse Sear
High-heat searing creates a deeply caramelized, crunchy crust by rapidly exposing meat to intense temperatures, promoting Maillard reaction on the surface. Reverse sear, by slowly cooking the meat first then finishing with a brief high-heat sear, results in a more evenly developed crust with a balance of tenderness and crispness. The high-heat sear tends to produce a thicker, more robust crust, while reverse sear offers precise control over crust thickness and uniformity.
Flavor Development: Maillard Reaction Explained
High-heat sear rapidly initiates the Maillard reaction, creating a deeply caramelized crust that enhances savory, complex flavor compounds on the meat's surface. Reverse sear involves slow cooking followed by a brief, intense sear, allowing even internal temperature and improved moisture retention while still fostering the Maillard reaction for balanced flavor development. Both techniques optimize crust formation through controlled protein and sugar interactions, critical for achieving rich, umami-packed taste profiles.
Moisture Retention: Does Searing Technique Matter?
High-heat sear creates an intense Maillard reaction quickly, forming a flavorful crust but may cause more moisture loss due to rapid surface dehydration. Reverse sear involves slow cooking before a final high-heat sear, promoting even internal temperature and better moisture retention while still developing a rich crust. Studies show reverse searing preserves juiciness significantly better than traditional high-heat searing, making it ideal for optimal moisture retention in roast preparation.
Best Cuts of Meat for Each Searing Method
High-heat sear excels with tender, marbled cuts like ribeye, filet mignon, and strip steak, as the intense heat quickly forms a flavorful crust while maintaining juicy interiors. Reverse sear suits thicker, tougher cuts such as prime rib, chuck roast, and brisket, allowing even cooking at low temperatures before finishing with a hot sear for optimal crust development. Choosing the right cut maximizes flavor and texture based on the searing method applied.
Step-by-Step Guide: High-Heat Sear Technique
Start by preheating a heavy skillet or cast-iron pan over high heat until it is smoking hot to ensure optimal crust development. Pat the meat dry with paper towels and season generously before placing it in the pan without overcrowding to maintain surface temperature. Sear each side for 2-3 minutes until a deep, caramelized crust forms, then finish cooking to desired doneness using lower heat or oven if necessary.
Step-by-Step Guide: Reverse Sear Technique
The reverse sear technique starts by cooking the roast slowly at a low temperature, typically around 225degF (107degC), until the internal temperature reaches about 10-15degF below the desired doneness. Next, the roast is finished with a high-heat sear in a preheated cast-iron skillet or grill, usually at 500degF (260degC) or higher, to develop a deeply caramelized crust. This method ensures an even internal cook with maximum crust development compared to traditional high-heat searing alone.
Choosing the Right Searing Method for Perfect Roast Crust
High-heat sear rapidly forms a dark, flavorful crust by applying intense direct heat, ideal for thinner cuts or when time is limited. Reverse sear slowly cooks the roast first, then finishes with high heat to create an even crust while preserving juicy interior tenderness, suitable for thicker cuts. Selecting the searing method depends on roast size and desired texture, balancing crust development with internal doneness precision.
High-heat sear vs reverse sear for crust development Infographic